photo by Lauren Matthews
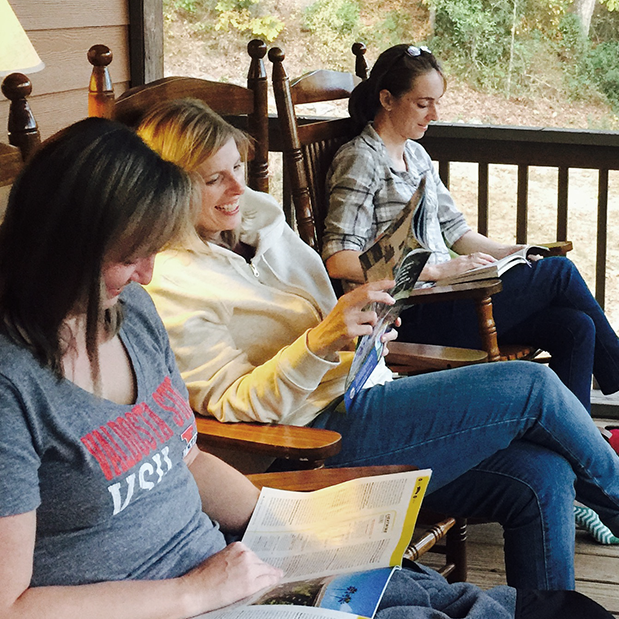
My friend's cabin has a sign hanging above the door that leads to a porch teetering high above a rushing river. The sign reads, 'It takes a long time to grow old friends'. And don't I know it!
Moving halfway across the country – where I knew a whopping grand total of zero – has definitely made me hyper-aware of just how much I miss my dear friends. Making friends when you're younger just seems to happen naturally, yet making friends as an adult takes serious work. You know you need to do it. You know it's good for you. But finding new people is tough. And as a freelancer, I don't have a workplace or other intimacy incubator in which forced togetherness could flourish into something more. So, I began to look forward to that rare weekend where one leaves behind a spouse, kiddos, pets, work, daily responsibilities (or in my case, all of the above) to relish in that glorious thing called "Girl Time."
photo by Becky Maldonado
October 2016 marked the "4th annual mountain retreat" for me and the small gaggle of women in my life who I would gladly give a copy of my house key, has seen me cry, knows that I watch The Bachelor and points out that I say the words 'fresh' and 'lush' way too much. It's all under the guise of a book club, yet is really an excuse to laugh, craft, walk, shop, share, read, talk, and eat – all those things that make life just a little bit richer.
Thanks for the wonderful weekend, my huckleberries!
xox: Becky, Lauren, Angela, Amy, Michelle, and Brenda


Fall Craft Bonus!
In celebration of Halloween next week, I thought I'd share the cute, little craft project we did during our mountain get-away.
What you'll need:
Black sock
Scissors
Black Thread & White Thread
Sewing Needle
Two Buttons
Orange or Pink Felt
Poly-fill Stuffing & Micro Beads
Ribbon


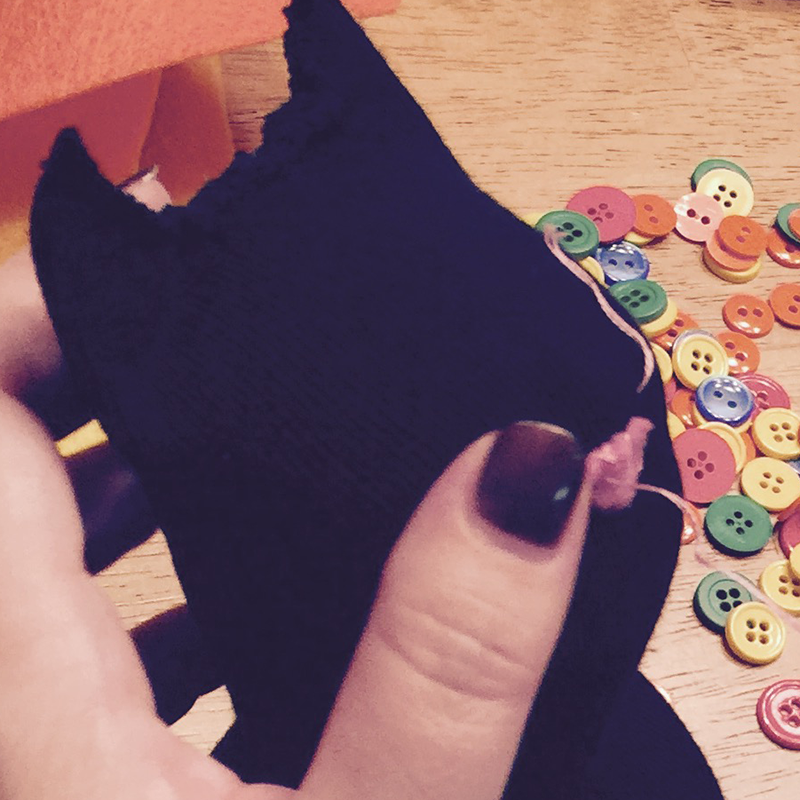

Step 1: Cut your sock in an arc near the heel (to make pointy cat ears).
Step 2: Stuff with Poly-fill. We added micro beads to the bottom of ours so the cat would easily stand on its own.
Step 3: Whip stitch the top closed.
Step 4: Add button eyes, felt nose, whiskers, and a ribbon to finish.


